
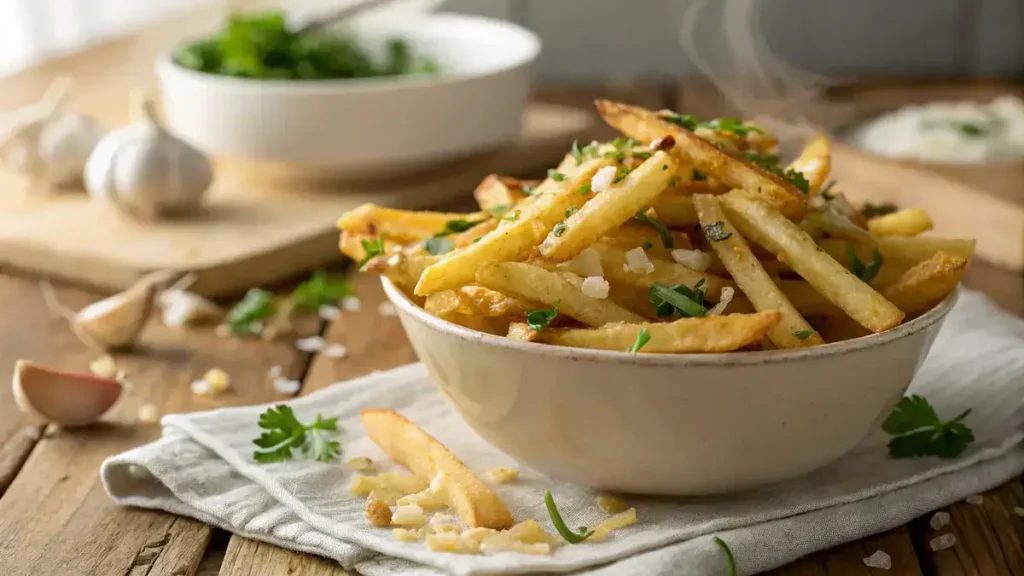
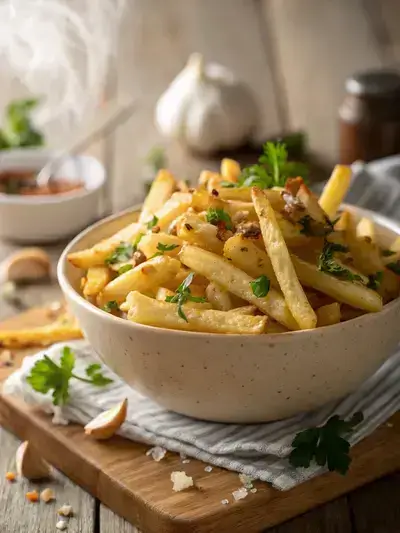
Garlic fries are the ultimate crispy delight that will make your taste buds dance with joy! Imagine perfectly golden fries, tossed in a fragrant blend of fresh garlic, aromatic herbs, and a sprinkle of zesty lemon juice, creating a flavor explosion in every bite. These fries are not just a side dish; they’re a celebration of comfort food at its finest! Whether you’re enjoying them as a snack or pairing them with your favorite burger, these garlic fries are sure to steal the show. Get ready to indulge in this irresistible treat that’s simple to make and utterly delicious!
Table of Contents
Why You’ll Love This Recipe
- Irresistibly crispy texture that satisfies every crunch craving.
- Garlic aroma that fills your kitchen and makes your mouth water.
- Simple ingredients you probably already have at home.
- Perfect for sharing or enjoying solo as a tasty snack.
- Customizable with your favorite herbs and spices for a personal touch.
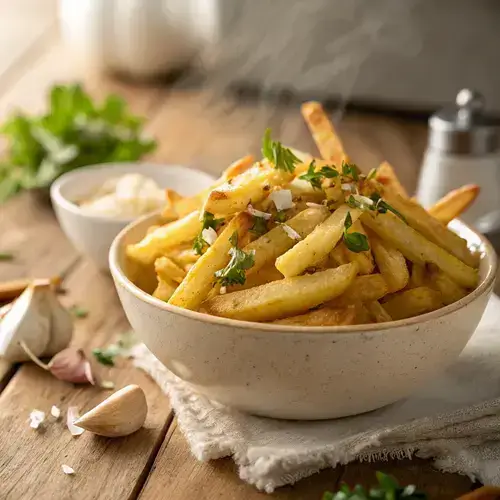
garlic fries
Ingredients
Equipment
Method
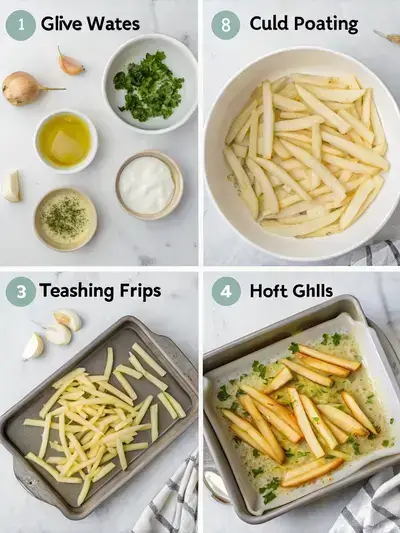
- 1. Wash and Peel Potatoes: Start by washing your potatoes thoroughly. Peel them and cut them into fry shapes. Aim for even sizes for consistent cooking.
- 2. Rinse in Cold Water: Rinse the cut fries in cold water. This helps remove excess starch, making them crispier. Pat them dry with a clean towel.
- 3. Preheat Oven: Preheat your oven to 425°F (220°C). This is the perfect temperature for achieving that golden crispiness.
- 4. Toss with Olive Oil: In a large bowl, toss the fries with olive oil, salt, and pepper. Make sure every fry is coated evenly for the best flavor.
- 5. Spread on Baking Sheet: Spread the fries out on a baking sheet in a single layer. This helps them cook evenly and get that nice crunch.
- 6. Bake Until Golden: Bake the fries for 25-30 minutes. Flip them halfway through to ensure they’re golden and crispy all around.
- 7. Sauté Minced Garlic: While the fries are baking, sauté minced garlic in a bit of olive oil over low heat. Cook until fragrant, about 1 minute. Be careful not to let it brown!
- 8. Toss with Garlic and Parsley: Once the fries are done, toss them immediately with the sautéed garlic, fresh parsley, and Parmesan if you like. Yum!
- 9. Serve Hot: Serve your garlic fries hot and enjoy the crispy, garlicky goodness!
Nutrient
| Nutrient | Amount per serving |
|---|---|
| Calories | 250 |
| Fat | 12g |
| Protein | 4g |
| Carbs | 36g |
| Fiber | 4g |
| Sodium | 300mg |
Recipe Snapshot
| Feature | Details |
|---|---|
| Category | Snack |
| Cuisine | American |
| Prep Time | 15 minutes |
| Cook Time | 30 minutes |
| Total Time | 45 minutes |
| Dietary | Vegetarian |
| Serves | 4 |
| Best Served | Hot and crispy |
Ingredients
Here’s what you’ll need to whip up some delicious garlic fries!
- 4 large russet potatoes – for crispy fries
- 4 cloves garlic – minced for flavor
- 3 tbsp olive oil – for frying
- 1 tsp salt – to taste
- 1/2 tsp black pepper – adds a bit of spice
- 2 tbsp chopped fresh parsley – for garnish
- 1 tbsp grated Parmesan – optional for extra richness
- cooking spray or oil – for frying
How to Make Garlic Fries
Get ready for a crispy, garlicky treat that will make your taste buds dance!
1. Wash and Peel Potatoes
Start by washing your potatoes thoroughly. Peel them and cut them into fry shapes. Aim for even sizes for consistent cooking.
2. Rinse in Cold Water
Rinse the cut fries in cold water. This helps remove excess starch, making them crispier. Pat them dry with a clean towel.
3. Preheat Oven
Preheat your oven to 425°F (220°C). This is the perfect temperature for achieving that golden crispiness.
4. Toss with Olive Oil
In a large bowl, toss the fries with olive oil, salt, and pepper. Make sure every fry is coated evenly for the best flavor.
5. Spread on Baking Sheet
Spread the fries out on a baking sheet in a single layer. This helps them cook evenly and get that nice crunch.
6. Bake Until Golden
Bake the fries for 25-30 minutes. Flip them halfway through to ensure they’re golden and crispy all around.
7. Sauté Minced Garlic
While the fries are baking, sauté minced garlic in a bit of olive oil over low heat. Cook until fragrant, about 1 minute. Be careful not to let it brown!
8. Toss with Garlic and Parsley
Once the fries are done, toss them immediately with the sautéed garlic, fresh parsley, and Parmesan if you like. Yum!
9. Serve Hot
Serve your garlic fries hot and enjoy the crispy, garlicky goodness!
Pro Tips for Making garlic fries
- Soak your fries in cold water for at least 30 minutes to achieve maximum crispiness.
- Use fresh garlic for a more robust flavor; sauté it lightly to avoid bitterness.
- Opt for a high smoke point oil, like canola or avocado oil, for frying.
- Season your fries immediately after frying for better flavor absorption.
- Experiment with herbs like parsley or rosemary for an extra flavor boost.
How to Serve
- Serve hot and crispy straight from the oven.
- Pair with a zesty garlic aioli for dipping.
- Top with freshly grated Parmesan for an extra flavor kick.
- Enjoy alongside a refreshing salad for a balanced meal.
- Serve as a side with grilled chicken or veggie burgers.
- Sprinkle with fresh herbs like parsley or chives for a pop of color.
- Try them with a squeeze of lemon for a bright finish.
Make Ahead and Storage
Storing and enjoying your garlic fries later is easy!
Storing Leftovers
- Let fries cool completely before storing.
- Place in an airtight container.
- Refrigerate for up to 3 days.
Freezing
- Cool fries completely before freezing.
- Spread on a baking sheet to freeze individually.
- Transfer to a freezer-safe bag or container.
- Store for up to 2 months for best quality.
Reheating
- Preheat oven to 400°F (200°C).
- Spread fries on a baking sheet in a single layer.
- Bake for 10-15 minutes until crispy.
- For microwave, heat in short intervals, but texture may vary.
You can visit our breakfast, lunch, dinner and desserts recipes from here:
breakfast,
desserts,
dinner,
lunch
FAQs
Here’s a helpful FAQ about this recipe:
1. Can I use frozen fries for this recipe?
Yes, you can definitely use frozen fries! Just make sure to follow the cooking instructions on the package for the best results. Once they are cooked, toss them with garlic and seasoning for that delicious flavor.
2. What type of garlic should I use?
Fresh garlic is ideal for this recipe as it provides the best flavor. However, if you’re in a pinch, garlic powder can be used as a substitute. Just remember to adjust the quantity since garlic powder is more concentrated.
3. How can I make my garlic fries extra crispy?
To achieve extra crispy fries, make sure to spread them out in a single layer on the baking sheet and avoid overcrowding. You can also try preheating the baking sheet before adding the fries for an added crunch.
4. Can I add cheese to my garlic fries?
Absolutely! Adding cheese can take your garlic fries to the next level. Just sprinkle some shredded cheese on top during the last few minutes of baking to let it melt beautifully over the fries.
5. What dipping sauces pair well with garlic fries?
Garlic fries pair wonderfully with a variety of dipping sauces. Some popular options include ranch dressing, aioli, or even a spicy ketchup. Feel free to get creative with your favorite sauces!
6. How do I store leftover garlic fries?
To store leftover garlic fries, let them cool completely and then place them in an airtight container in the refrigerator. They can be reheated in the oven to regain some of their crispiness. Just be sure to enjoy them within a few days!
7. Can I make garlic fries in an air fryer?
Yes, making garlic fries in an air fryer is a great option! Just toss your fries with garlic and seasoning, then air fry them at 400°F for about 15-20 minutes, shaking the basket halfway through for even cooking.
8. What herbs can I add to enhance the flavor?
Adding herbs like parsley, rosemary, or thyme can enhance the flavor of your garlic fries. Just sprinkle them on after baking for a fresh and aromatic touch!
Final Thoughts
So there you have it—your ticket to crispy, garlicky bliss! These garlic fries are not just a treat; they’re a delightful way to bring a little nostalgia to your table. Simple to make and oh-so-rewarding, they’re perfect for sharing (or not!). Dive in, savor every bite, and enjoy the smiles they bring!